How To Repair A Scratch In The Paintwork
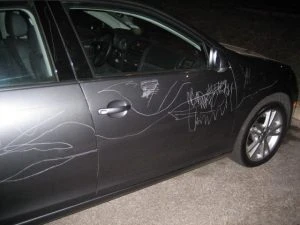
If the scratch is this bad, it’s probably best to take it to a professional.
#$%^&*()$%^&*!!!!!!! You left your car in the supermarket carpark looking perfect with nicely polished paintwork, and when you got back, you found that some clown opened their door and nicked the paintwork. Or the dog was just so pleased to see you and jumped up trying to lick your face through the car window with scrabbling paws and left marks of their affection all over the panelwork. Or (worst case scratching scenario) some pillock (and that’s using mild language) decided it would be funny or appropriate to key your car and leave marks all down the side.
It doesn’t matter how the scratch got there, whether you missed the keyhole with the key or whether your toddler rode a tricycle too close to the car in the driveway: it’s got to be fixed. And yes, despite what dodgy used car sales people will tell you, even a teeny weeny little scratch does matter. It lowers the value of your car and it makes your car’s paintwork look ugly. What’s more, not bothering and not caring about the scratch can lead to a general attitude of neglect and can’t-be-stuffedness about car maintenance, which can lead to you eventually not bothering about or putting off essential maintenance tasks like topping up the fluids and checking the oil.
Most importantly, scratches allow water, chemicals, grit and dirt to get to the metal beneath the paintwork. This means that the metal is going to corrode more quickly, and we all know how once rust starts, it doesn’t stop easily without a lot of hard work, either by you or your local friendly mechanic.
Small scratches, if they’re not associated with dents, are easy enough to fix at home with equipment you may already have or that is easily picked up at your nearest automotive supply shop.
First of all, clean the area on and around the scratch. There’s no point sealing grit and dirt under new paint.
Next, assess how deep the scratch is. If it hasn’t gone all the way through the paint or it has only gone through the top layer, it will take a lot less effort to fix. Did you know that car paint involves four layers? Lightly run the tip of your fingernail across the surface (making sure you don’t scratch the paintwork any further). If the tip of your nail snags a little bit in the scratch, you’ve got a deeper one to deal with. If you can’t feel it, you’ve got a surface-only scratch.
We’ll assume that you’ve already washed the area thoroughly, rinsed it and dried it. Now you need to roughen the surface so that it will take the new paint or filler. Small scratches that have just taken off the top coat or so can be prepped with toothpaste – apply whatever’s in the bathroom cabinet to a soft damp cloth and buff away. Rinse thoroughly after you’ve enjoyed the nice minty smell and dry the area. If you’ve got a deeper scratch, use very fine sandpaper (2000 grit) to work gently over the area. Then wash and dry the area like heck to get all the dust away.
Now the road divides. If you’re dealing with a more serious scratch that gets into the colour layer, the base coat or even (horrors!) the metal of the vehicle body, you need to go to the next paragraph. If you’ve got a small scratch, then just read on. With a small scratch, you get rubbing compound and wax from your local automotive supplies shop, apply a little bit of the rubbing compound and buff it like heck in small surfaces. If you’ve ever buffed a floor or your nails, you know how this is done. After this, apply wax and you should be all good.
With a deeper scratch, you’re going to have to replace the coloured paint and possibly the primer below it as well. Here, you’ll have to spend a bit of time doing your homework, as you will need to get the right sort of paint or you will have an odd patchwork spot on your vehicle that looks worse than the scratch. If you know where to look on your car body (it varies from marque to marque), you can find the code number for the paint type. Try the door jamb, the glove box, in the bonnet by the VIN sticker, in the boot by the spare tyre, the owner’s manual… Yes, there are websites that have databases of the codes, but you have to be sure that you search on an Australian site (US and UK ones don’t have some Aussie favourites like the Ford Falcon). It also pays to know the name of your paint colour – there’s a lot more than 50 shades of grey out there… Do your homework, get that number and march down to the automotive supplies shop with it and ask for it (or you can try ordering it online).
Use a scuffing pad to roughen up the surface immediately on and around the scratch so it will take new paint. Don’t do too wide an area. After brushing surface dust away (blow on it), apply the primer and let it dry.
Once the primer has dried, it’s painting time. You can apply it with a brush, a pen or as a spray. A spray gives the nicest finish, but you’ll need to mask off things like headlights and bumpers. Let it dry for at least 15 minutes, then apply another layer. You may need to apply several layers until the scratch area looks like the undamaged paint around it.
Finish off with a spray-on clear coat, then a good waxing after the clear coat has dried. Wax the whole car while you’re at it so you don’t get funny looking patches of dull and shiny.
More extensive scratches, such as those inflicted by pillocks keying your car, may be better dealt with by a professional. It’ll certainly be less hassle.